Configuration as code of Okta in Ontrack in Kubernetes
In a previous post, we've seen how easy it was to install Ontrack into a Kubernetes cluster, with or without a managed database.
In this present article, we'll see how to not only install Ontrack but also to configure it as code, for an integration with Okta for its authentication.
Prerequisites
In order to follow the steps of this article, you'll need:
- a Kubernetes cluster
- a Helm client (3.x) configured for this Kubernetes cluster
- an Okta account (you can use a free developer account)
Ontrack installation
As shown in a previous post, installing Ontrack in Kubernetes is as easy as running a few Helm commands.
Let's start by setting up the Ontrack Helm chart repository:
helm repo add ontrack https://nemerosa.github.io/ontrack-chart
helm repo update
To prepare the future setup, we'll already create an empty values.yaml file and pass it to the Ontrack release:
touch values.yaml
helm install -f values.yaml my-ontrack-release ontrack/ontrack
You can then navigate to Ontrack at http://localhost:8080 using:
kubectl port-forward service/my-ontrack-release 8080:httpYou can login using admin / admin as credentials.
Okta setup
While you can change the default admin password and also register some users in the internal user directory of Ontrack, for a more robust and secure installation, you'll need to interface with a proper solution like a LDAP or an OpenID Connect identity provider, like Okta or Keycloak.
In this article, we'll use Okta and we will first set it up.
Go to your Okta admin dashboard, the URL looks somehow like https://<domain>-admin.okta.com/admin/dashboard and navigate to Applications > Applications.
Click on Create App Integration.
Select OIDC - OpenID Connect and then Web Application. Click Next.
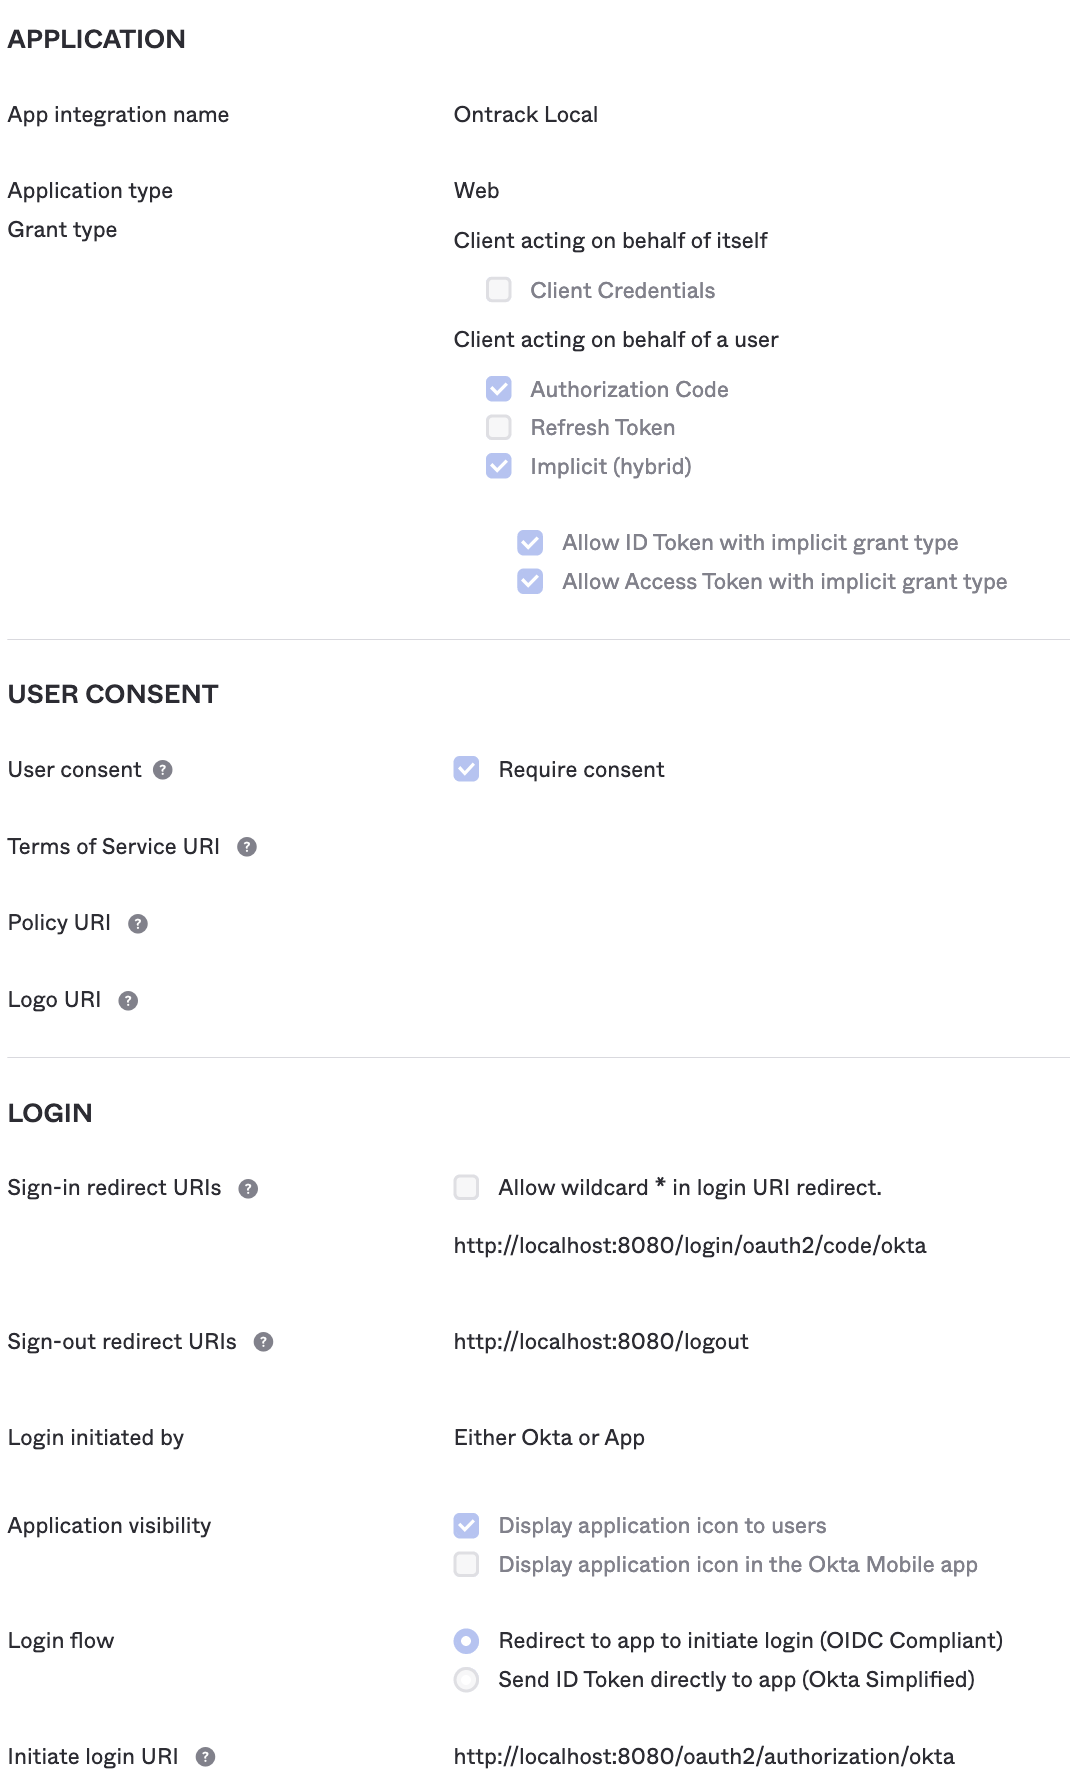
On the next page, choose any name for your application (I chose Ontrack Local here) and select the following options:
- in Grant type, in the Client acting on behalf of a user section, select both Authorization code (preselected) and Implicit (hybrid).
- in Sign-in redirect URIs, enter
http://localhost:8080/login/oauth2/code/okta - in Sign-out redirect URIs, enter
http://localhost:8080/logout - select Allow everyone in your organization to access
- click Save
In the next page, click Edit and:
- in Login initiated by, select Either Okta or App
- in Application visibility, select what you prefer
- in Initiate login URI, enter
http://localhost:8080/oauth2/authorization/okta - click Save
Copy the client ID & secrets. We'll need them later for the Ontrack configuration.
In the Sign On tab, in the OpenID Connect ID Token section, configure the Groups claim type as shown below:
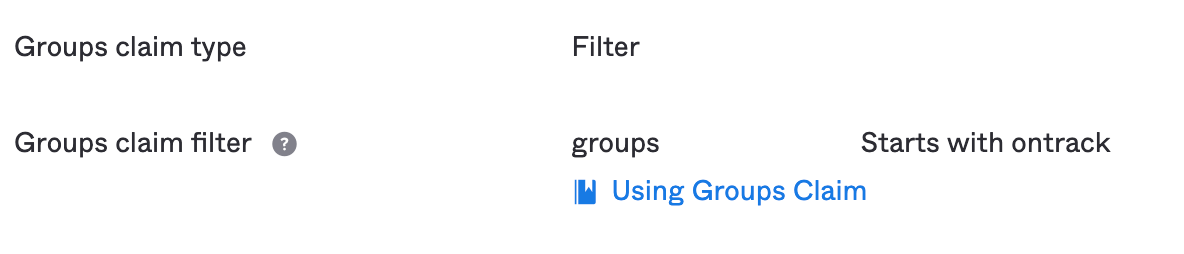
Other group configurations are possible, depending on your context. Here, we make sure to pass the Okta groups we'll create below.
Now, let's create some groups (we'll use them for mapping groups & users to specific authorizations in Ontrack).
In Okta, in Directory > Groups, create two groups:
ontrack-adminsontrack-users
In Directory > People, create two users:
- Ontrack User, in the group
ontrack-users - Ontrack Admin, in the groups
ontrack-usersandontrack-admins
I've unselected User must change password on first login so that we have a simple password to start with.
Our Okta setup is finished, and we'll focus now on setting up Ontrack, using its Configuration as Code (CasC) possibilities in Kubernetes.
CasC files in Kubernetes
Ontrack CasC in Kubernetes relies on configuration files being given as the properties of either configuration maps or secrets objects.
The configuration maps are used for CasC files which do not contain any sensitive information. All files, in the configuration maps and the secrets, will be merged by Ontrack.
Let's put everything non-secret in a configuration map object and our Okta secrets in a Kubernetes secret.
Create a security.yaml file containing the Okta connection information:
ontrack:
   config:
      oidc:
         - id: "okta"
           name: "Okta"
           description: "Okta"
           # Replace <domain> by your own
           issuerId: "https://<domain>.okta.com/oauth2/default"
           clientId: "<copied from Okta>"
           clientSecret: "<copied from Okta>"
           groupFilter: "ontrack-.*"
           # Force HTTPS must be false when using a non HTTPS
           # URL like http://localhost:8080
           forceHttps: false
           disabled: false
Create a Kubernetes secret:
kubectl create secret generic \
   ontrack-casc-secrets \
   --from-file security.yaml
We'll also use a configuration map to setup the mapping between the Okta groups and the Ontrack ones, specifically between the ontrack-admins Okta group and the built-in Administrators group in Ontrack.
Create a group-mappings.yaml file:
ontrack:
   admin:
      group-mappings:
         - provider: oidc
           providerKey: okta
           providerGroup: ontrack-admins
           group: Administrators
Create the configuration map:
kubectl create configmap ontrack-casc \
   --from-file group-mappings.yaml
You have now created the needed CasC files for Okta but you now have to tell Ontrack to use them (as code of course!).
Enabling CasC in Ontrack
In the values.yaml file created at the beginning, which was so far empty, add some Helm values to tell Ontrack to use the secret object and the configuration map you just added as a source for its configuration as code:
# values.yaml
ontrack:
   casc:
      enabled: true
      map: ontrack-casc
      secret: ontrack-casc-secrets
Upgrade your Ontrack Helm release with these values:
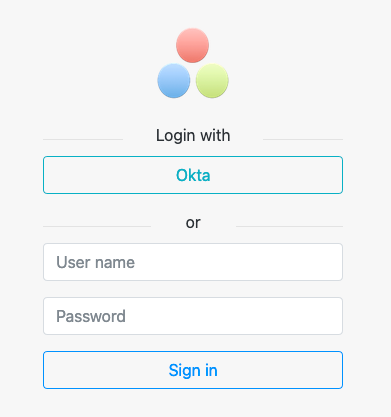
helm upgrade -f values.yaml my-ontrack-release ontrack/ontrackWhen the deployment is complete, you can go to http://localhost:8080, click on the Login with Okta button:
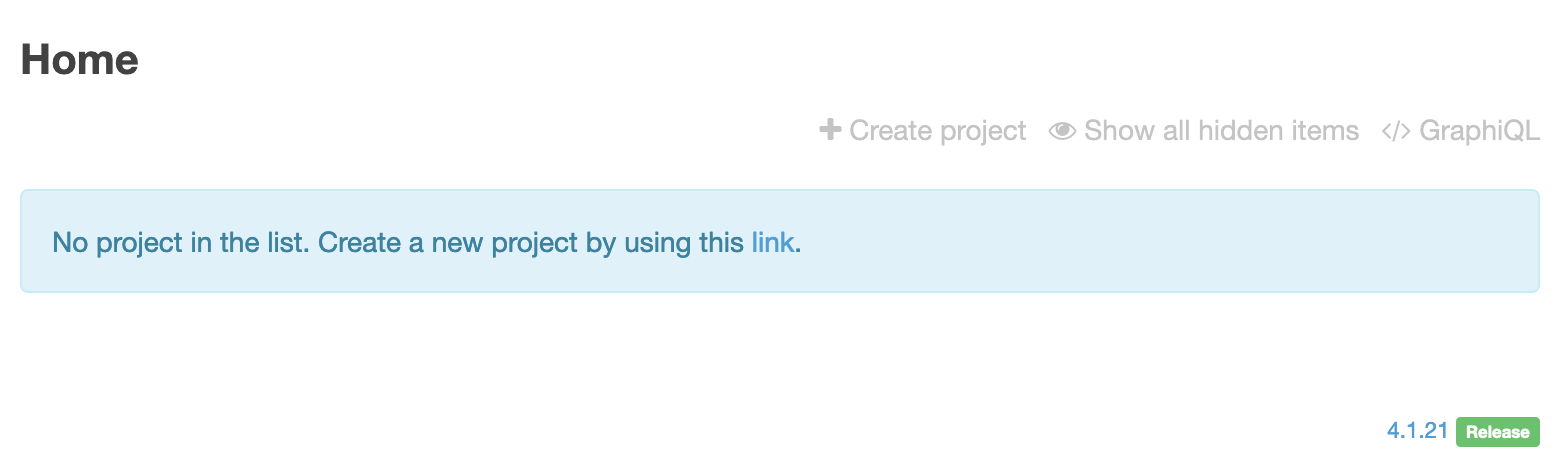
Use the Ontrack Admin user credentials and check that you're a proper administrator of Ontrack (you should see the Create project option):
Auto reload of CasC values
Ontrack is able to reload automatically the CasC values and to adjust its configuration when they change.
You can enable this "Casc reloading" and set a schedule for it. Edit the values.yaml file:
ontrack:
   casc:
      enabled: true
      map: ontrack-casc
      secret: ontrack-casc-secrets
      reloading:
         enabled: true
         cron: "0 */5 * * * *"
This setup will tell Ontrack to reload its configuration every five minutes.
Upgrade the Helm release to activate this setup:
helm upgrade -f values.yaml my-ontrack-release ontrack/ontrackDisabling the built-in authentication
In order to fully secure the Ontrack instance, it remains to disable the built-in authentication and to rely solely on Okta.
Create a settings-security.yaml file with the following content:
ontrack:
   config:
      settings:
         security:
             builtInAuthenticationEnabled: false
This CasC file will tell Ontrack to disable the built-in authentication.
Let's add it as a property to the existing ontrack-casc configuration map:
kubectl delete configmap ontrack-casc
kubectl create configmap ontrack-casc \
   --from-file group-mappings.yaml \
   --from-file settings-security.yaml
After 5 minutes at most, the configuration will be reloaded and Ontrack built-in authentication will have been disabled, leaving only Okta as the source of authentication.
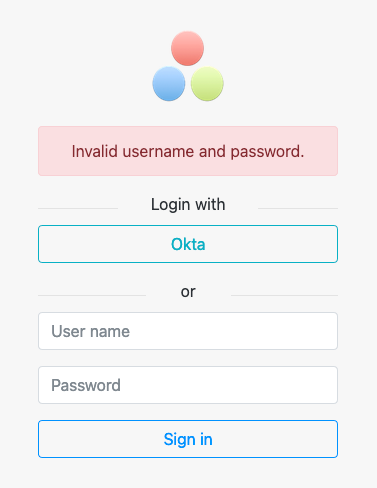
You can try to login with admin / admin and check that the authentication fails:
Cleanup
To remove the installation, just delete the Helm release:
helm delete my-ontrack-releaseConclusion
In this article, you have seen how to:
- install Ontrack on Kubernetes
- configure Okta for Ontrack
- configure CasC for Ontrack
- configure Okta in Ontrack using CasC
- enable CasC auto reload in Ontrack
- disable the built-in authentication
You can have more information about these features of Ontrack at:
Questions? Remarks? Join the discussion at https://gitter.im/nemerosa/ontrack