Saving money with Jenkins, Digital Ocean and Docker
Once upon a time, I was using Jenkins to build my applications on a lonely but powerful master instance, hosted at Digital Ocean. Everything was good until I realized I paid 40 USD a month for a machine which was idle most of the time (for 2 CPU and 4 GB of memory).
The solution was obvious: I needed to get rid of my big master and replace it by transient slaves.
So it went from:
- 4 GB / 2 CPU (40 USD / month) for one master
to:
- 2 GB / 2 CPU (20 USD / month) for one master
- 2 GB / 2 CPU (20 USD / month) for on-demand slaves
The master comes at a fixed cost, but according to the build frequency, I'll pay from 0 to 20 USD a month for the slave.
On-demand slave provisioning
First of all, I've installed the Jenkins Digital Ocean plug-in on my Jenkins master, then I've configured a cloud.
In Digital Ocean:
- I needed to create an API token which I can use for authentication
- create a SSH key pair which will be used to access the droplets
In Jenkins, I went to Manage Jenkins > Configure System and created the following cloud:
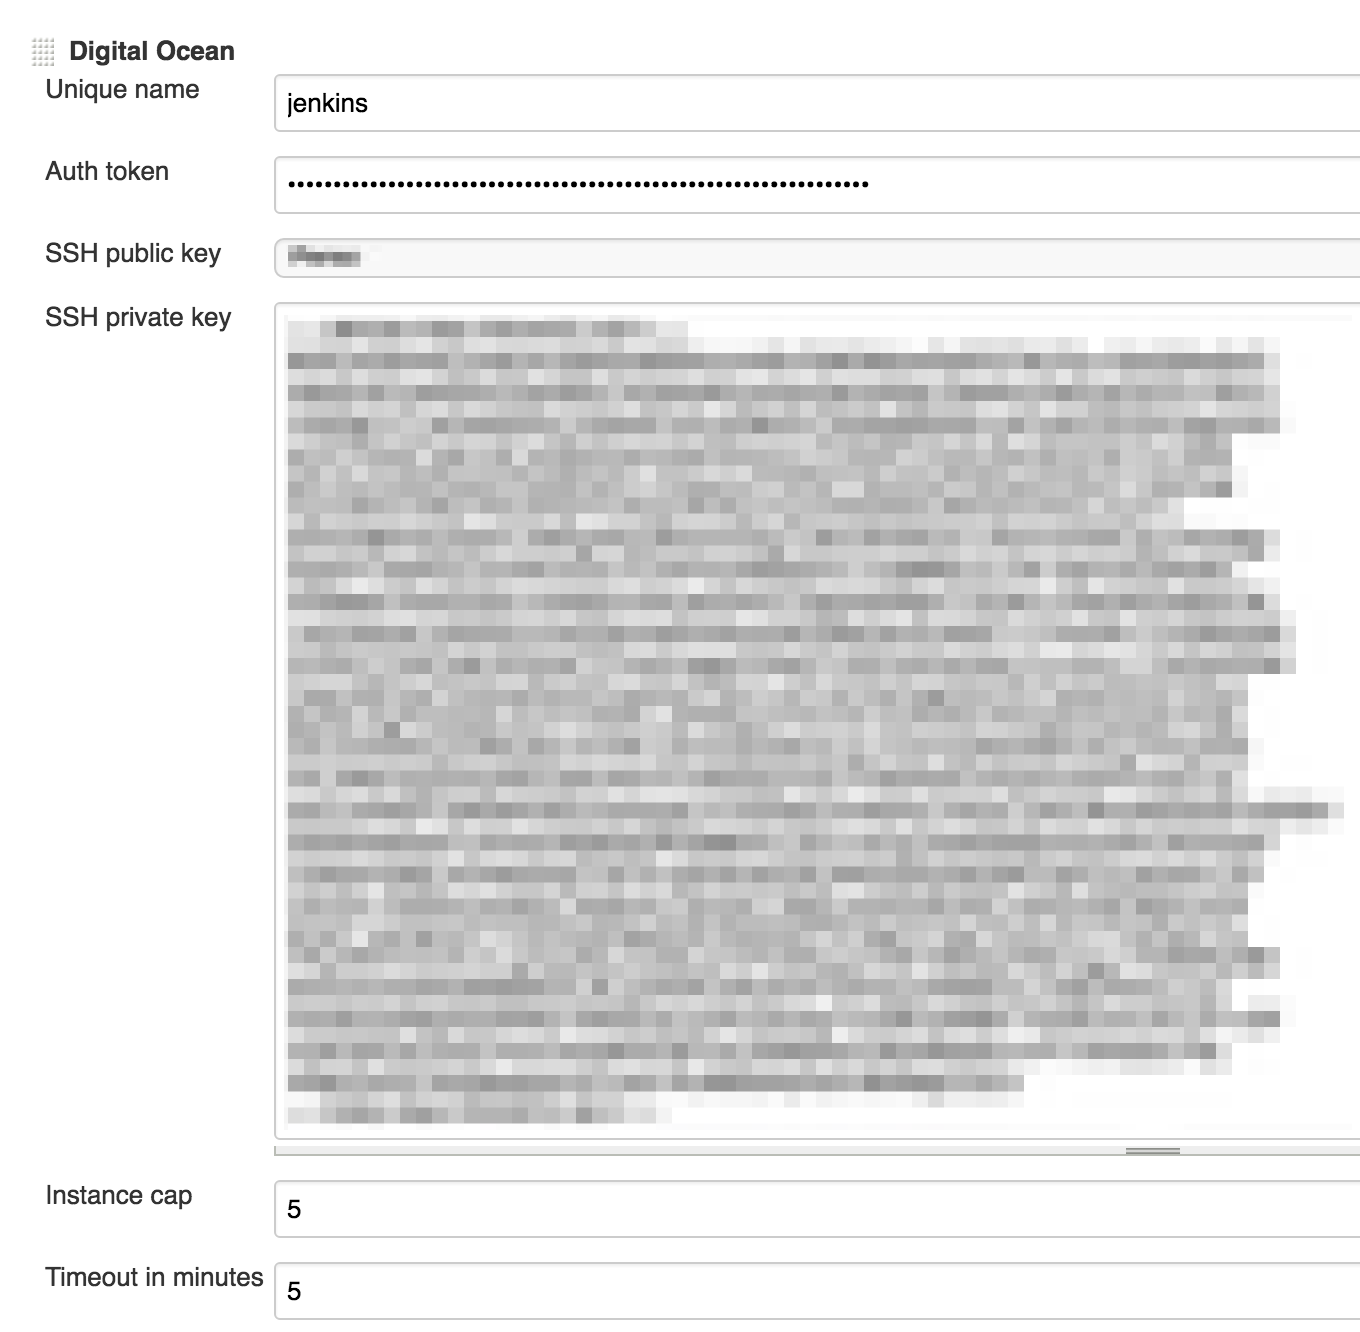
where:
- the Auth Token is the API key created at Digital Ocean
- the SSH public / private key are the components of a SSH key created at Digital Ocean
- the instance cap and timeout can be left to defaults, since I decided to define them at droplet level (see below)
Finally, I register a droplet pool for my application to be built on:
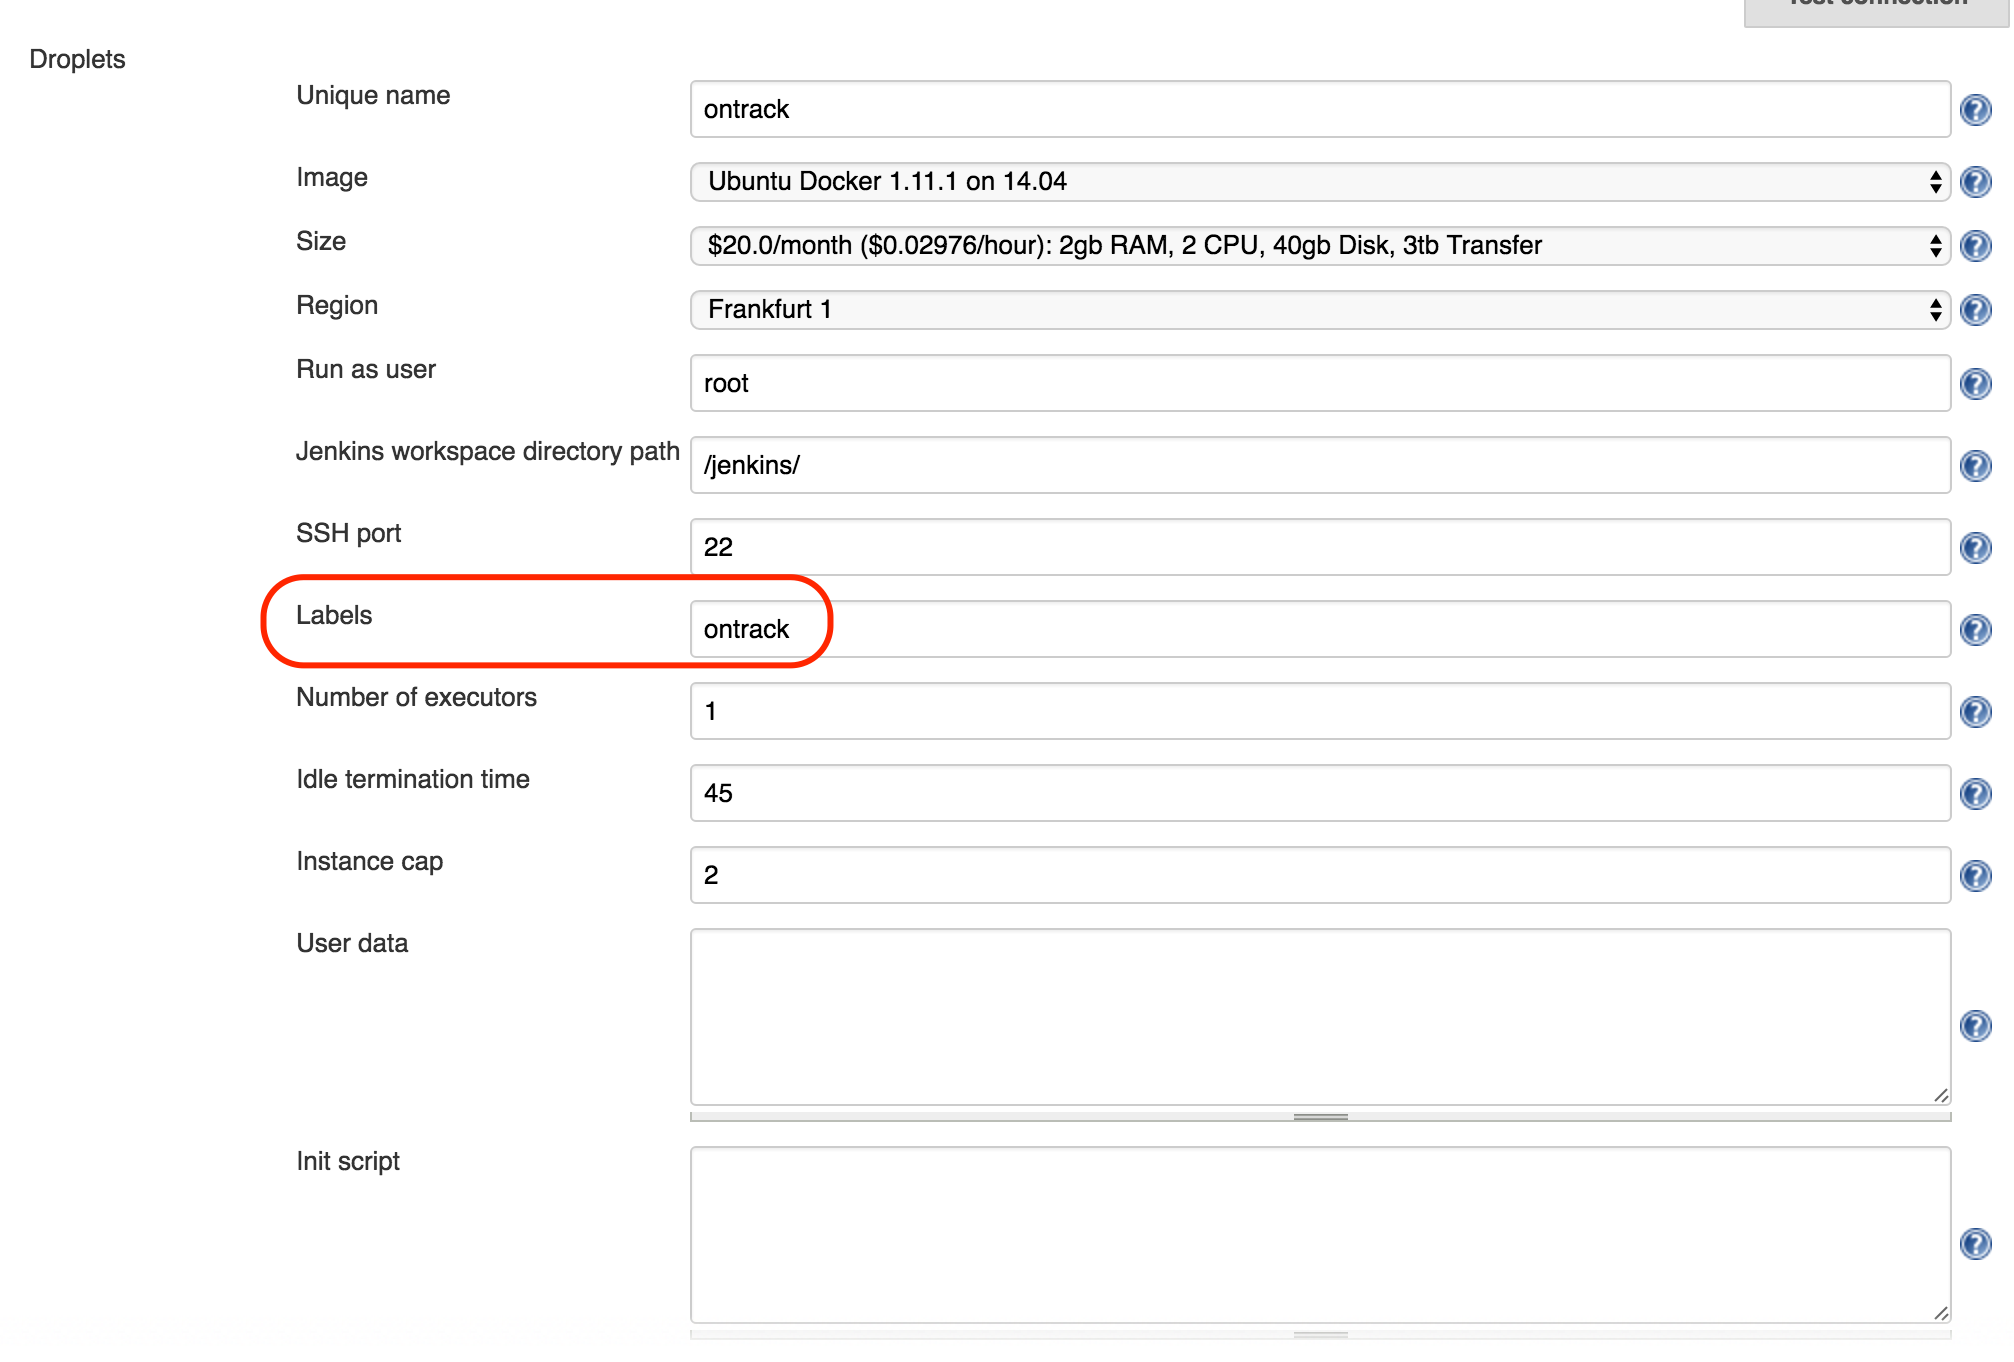
The label name is very important - here ontrack in my case - because that will be used by Jenkins to trigger the lifecycle of the droplets. Note also that I have chosen the Ubuntu Docker image to be provisioned - this will be important later.
In idle times, no droplet is created.
When a build is started which requires the ontrack label, the DigitalOcean plugin will initiate the creation of a droplet according to the settings mentioned above.
Once the droplet is created, the plugin provisions it with what is needed to make it a Jenkins slave.
Once ready, the slave is made available for my build.
After 45 minutes of inactivity, the slave will be shutdown and the droplet destroyed. Note also that I've put a cap of 2 to the maximum number of droplets which can be created to answer to the load.
Finally, the documentation of the plugin states that we can set a negative number to the idle time in order to optimise the cost (DigitalOcean charges per fraction of hour). To be tested still...
Slave configuration with Docker
So now, I have a slave being created according to the build load. But I want to run my build in a specific environment. For example, the build for Ontrack requires Git and Subversion to be available on the command line, and Git to be configured (user name & email), in order to run some integration tests against those two SCM engines.
Of course, I could use the init script section of the slave provisioning, but I preferred to delegate the setup of the environment to the code itself, using a Dockerfile, and to run the build in a container based on this definition.
I installed the CloudBees Docker Custom Build Environment Plugin and configured my build to run using this Dockerfile:

Important settings are:
- path to the docker context: that's the directory which contains the
Dockerfile, in my caseseed/docker - the volume mapping to
/root/.gradleallows me to reuse the Gradle cache between two builds (at least while the slave is being reused) - the one about/root/.cacheis of the similar nature - note that you could do the same for Maven, with/root/.m2
Here is the Dockerfile I'm using:
# Base
# Using a Java based image in order to get the JDK we want, without having Jenkins to provision it
# each time on the slave
FROM java:openjdk-8u66-jdk

# Meta-information
MAINTAINER Damien Coraboeuf <...>

# SVN & Git installation
RUN apt-get update \
    && apt-get install -y subversion git

# Gradle cache
VOLUME /root/.gradle

# Node JS cache
VOLUME /root/.cache

# Git configuration
RUN git config --global user.email "jenkins@nemerosa.net"
RUN git config --global user.name "Jenkins"
Conclusion
Using those two plugins, the Digital Ocean plug-in and the CloudBees Docker Custom Build Environment Plugin, I was able to delegate the bulk of my build resources needs to an on-demand slave, to configure automatically using a Dockerfile and to get rid of the slave when not used any longer. The Jenkins master size could be reduced and in the end, my costs went down.